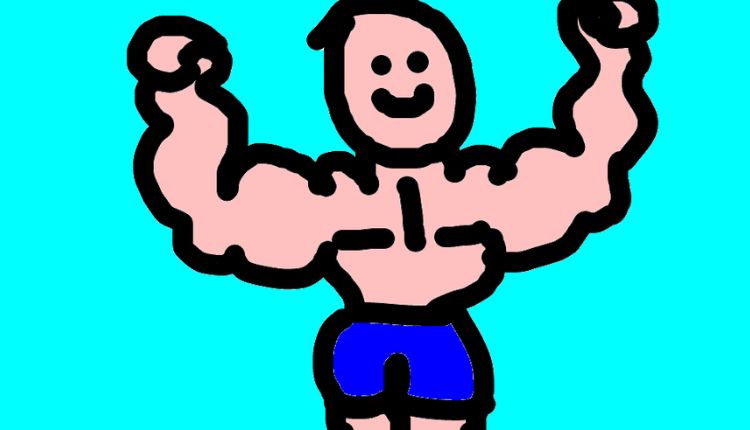
This subject is popular with both beginners and advanced artists, as Musculoso desenho are common in comics, anime, games and superhero art. By learning how to draw muscles correctly, your characters will look powerful, balanced, and believable. But musculoskeletal design is not just about how big bodies are; it’s about understanding structure, proportion, movement, and shading. When these elements work together, your drawings feel like a living place of rigidity.
In this SEO guide, you’ll learn step-by-step concepts related to musculoskeletal design, from the basics of anatomy to advanced shading and dynamic poses. Each section explains important ideas in detail so you can practise and keep improving. Inside the article, you will also find some useful bullet points for quick learning and revision. If you want to create strong, confident characters and improve your overall drawing skills, this guide will help you build a solid foundation.
Understanding Anatomy for Musculoso Desenho
To master musculoso desenho, you must first understand basic human anatomy. Muscles are not random shapes; they follow clear patterns associated with bones and joints. When you understand where the muscles start and end, your drawings will be more realistic and natural. Even stylised figures are based on real anatomy, only exaggerated in size or shape.
Start by learning the major muscle groups such as chest, shoulders, arms, abs, back and legs. You don’t need to remember every little muscle at first, but you should know the main forms and how they overlap. Muscles also change shape depending on whether they are relaxed or flexed, which affects how they look in action poses.
Important anatomical concepts to focus on include:
- Muscle origin and insertion points on bones
- How muscles stretch and contract during movement
- How different body types affect muscle visibility
Another key part of anatomy is proportion. Even if the muscles are big, the body must still look balanced. Too big arms with tiny shoulders or short legs can make the character look awkward unless it’s a cartoon style. Learning standard body proportions will help you decide how much to exaggerate without disturbing the visual harmony.
When you practise anatomy regularly, you will quickly begin to recognise muscle patterns. This allows you to draw faster and more confidently. Over time, you will rely less on references and more on understanding the structure, which is a big step towards improving your musculoso desenho skills.
Building the body using simple shapes
One of the best ways to improve musculoso desenho is to start with simple shapes. Instead of jumping straight into detailed muscles, start with basic shapes like boxes, cylinders, and spheres. These shapes help you lock in body structure and pose before adding muscle detail.
For example, the chest may start as a large box, the arms as cylinders, and the head as a sphere. Once these shapes are positioned correctly, you can refine them into muscle forms. This method keeps your proportions accurate and helps you avoid common mistakes like uneven shoulders or a twisted torso.
Using simple shapes also helps with perspective. When the figure is facing forward, the shapes are easy to place, but when the body is rotated or foreshortened, the shapes guide you in displaying depth correctly. This is very important for dynamic muscle drawings.
Helpful steps in using shapes include:
- A sketch of a simple stick figure to define the pose
- Adding basic 3D shapes via a stick figure
- Refinement of shapes into muscular forms gradually
This approach makes managing complex bodies easier. Instead of feeling overwhelmed by the details, you focus on the structure first. After the texture looks right, adding muscle definition is much easier and more accurate.
Over time, you will begin to see the human body as connected volumes instead of flat outlines. This shift in thinking is necessary to create a strong, realistic musculoso desenho that looks solid and three-dimensional.
Drawing arms and shoulders with power
Arms and shoulders are often the focus of musculoso desenho because they show strength and action. The shoulder area, known as the deltoid muscle, connects the arm to the torso and plays a big role in how strong a figure looks. Understanding how this muscle wraps around the shoulder joint will help you draw smoother transitions between the chest, back and arms.
The upper arm has two main muscles: the biceps at the front and the triceps at the back. Many beginners only focus on the biceps, but the triceps actually make up the majority of the arm mass. Ignoring them can make the arms look flat or unrealistic. The forearm also has many muscles, but you can simplify them into a few flowing shapes for a cleaner design.
Things to remember when drawing arms:
- The deltoid muscle overlaps the muscles of the upper arm
- Biceps and triceps create opposite curves
- The forearm muscles twist slightly as the wrist rotates
The arms should not look like separate balls stuck to the body. They should naturally blend in with your chest and upper back. This connection is important to make the poses look solid and stable.
When the arms are bent, the muscles are more rounded and separated. When relaxed, they look smoother and less defined. Showing this difference will add realism to your musculoso desenho and make your characters feel more alive and expressive.
Building a strong chest and back
The chest and back are central to a muscular body. The broad chest and strong back give the figures a heroic and self-confident look. The main muscles of the chest, called the pectoral muscles, sit on top of the ribcage and connect to the upper arms. Their shape changes depending on the position of the arms, which is important for natural-looking poses.
The back is trickier, but you can make it easier by targeting large muscle groups like the trapezius and latissimus dorsi. These muscles create a broad wing-like shape that makes the figure look strong from behind. Even when drawing from the front, the back muscles affect shoulder width and posture.
Key ideas for drawing the chest and back include:
- The pectoral muscles attach to the arm and move with it
- The back muscles form a V shape for strong silhouettes
- The spine creates a centre line that guides symmetry
Posture also plays a big role in how your chest and back look. A straight, open stance makes the chest look larger and the back wider. A slouched posture reduces the visibility of muscles and changes the overall mood of the body.
By learning how these muscle groups interact, you can create a more dynamic and realistic upper body. This understanding will help you design characters that look strong without the need for extreme exaggeration.
Shaping the core and abdominal muscles
The core area includes the abdominals, obliques and lower back. In musculoso desenho, the abs are often drawn as a six-pack, but real abs are more varied in shape and size.
Instead of drawing perfect rectangles, think of abs as flexible muscle blocks that curve around the body. The centre line of the torso helps you place them symmetrically. Oblique muscles on the sides connect the abs to the back and add depth to the waist area.
Important tips for drawing the core:
- Abs follow the curve of the ribcage, not a flat line
- The centre line helps keep both sides balanced
- Obliques create a strong transition to the hips
The core is especially important in action poses because it shows twisting and bending. When a character turns, the abs stretch on one side and compress on the other. Showing this change makes your drawings feel more dynamic and natural.
A strong core design also improves the connection between the upper and lower body. This makes your characters look solid and well-built, which is essential for convincing musculoso desenho.
Designing Muscular Legs with Balance
Legs are often overlooked in muscular drawings, but they are just as important as the upper body. Strong legs support the entire figure and add stability to poses. The main muscle groups in the legs include the quadriceps in the front, hamstrings in the back, and calves below the knee.
The thigh area is large and powerful, and it should reflect that in your drawings. The quadriceps can be shown as three main muscle shapes that flow into each other. The hamstrings create smooth curves behind the leg and connect to the hips.
Key points for muscular leg drawing:
- Thigh muscles are larger than calf muscles
- Knees are bony landmarks that break muscle flow
- Calves have a high and low curve, not equal sides
Balance is very important when drawing legs. If one leg carries the body’s weight, the hips and shoulders shift slightly to keep balance. This small detail makes your poses more realistic and less stiff.
Strong leg design also improves your overall character silhouette. When the upper and lower body match in strength and size, your musculoskeletal system looks more believable and visually pleasing.
Adding Depth with Shading and Highlights
Shading is what turns flat muscle shapes into three-dimensional forms. Good shading shows where light hits the body and where shadows form between muscle groups. This helps viewers understand the character’s structure even without heavy outlines.
Start by choosing a clear light source. This could be from above, the side, or even behind the character. Once you know where the light comes from, you can place shadows consistently across the body. Muscles usually have rounded surfaces, so shading should follow curved forms, not straight lines.
Helpful shading techniques include:
- Using soft gradients for smooth muscle surfaces
- Adding darker shadows in muscle separations
- Placing highlights on raised areas facing the light
Do not overdo the shading, especially if you want a clean, stylised look. Too many dark lines can make the drawing messy. Instead, focus on simple shadow shapes that describe the form clearly.
Good shading improves the impact of your musculoskeletal desenho and makes your characters stand out more, whether in sketches, comics, or digital illustrations.
Developing Your Own Muscular Drawing Style
After learning the basics, the next step in musculoskeletal desenho is developing your own style. Some artists prefer realistic muscles with accurate anatomy, while others like exaggerated, comic-style bodies. Both approaches are valid as long as the structure remains believable.
Style comes from how you simplify or exaggerate forms. You might make shoulders wider, abs more defined, or limbs longer to create a heroic look. The key is consistency. If your arms are highly stylised, the rest of the body should follow the same design logic.
Ways to develop your own style:
- Study different artists and note what you like
- Experiment with exaggeration and simplification
- Practise drawing the same pose in different styles
Your style will evolve naturally as you draw more. Do not rush this process. Focus on strong fundamentals first, then slowly add personal touches. Over time, people will be able to recognise your work by its unique look and feel.
A strong personal style makes your musculoso desenho more memorable and helps you stand out as an artist, whether you are sharing online or working on creative projects.
Conclusion
Musculoso desenho is a powerful and exciting drawing skill that combines anatomy, structure, and artistic expression. By understanding muscle groups, building bodies with simple shapes, and adding depth through shading, you can create characters that look strong, dynamic, and believable. Each part of the body plays an important role, from shoulders and chest to legs and core, and learning how they work together is the key to improvement.
Consistent practice is the most important factor in success. Start simple, study real anatomy, and slowly increase the complexity of your drawings. Do not be afraid to make mistakes, because every sketch helps you learn something new. With time and patience, your musculoskeletal design skills will grow, and you will be able to create powerful characters with confidence and creativity.
FAQs
Q1: Do I need to memorise all muscle names to draw a musculoskeletal desenho?
No, you do not need to memorise every muscle name. It is more important to understand the main muscle groups and how they shape the body. Knowing basic forms and how muscles connect is enough for strong drawings.
Q2: Should beginners start with realistic or stylised muscular drawings?
Beginners should start with basic anatomy and simple, realistic forms. After understanding the structure, it becomes easier to create stylised or exaggerated characters without losing balance and believability.
Q3: How often should I practise muscular figure drawing?
Short daily practice is better than long, rare sessions. Even 20 to 30 minutes a day can lead to steady improvement if you focus on structure and consistency.
Q4: Is it okay to use references when learning musculoskeletal design?
Yes, using references is highly recommended. Photos, anatomy diagrams, and sports images help you understand real muscle shapes and movements more clearly.
Q5: What is the biggest mistake beginners make in muscular drawings? The biggest mistake is focusing too much on details before getting proportions and structure right. Always build the body first, then add muscle definition afterwards.